Contents
While trying to find Pilgrim’s Sanctuary in Star Wars Jedi: Survivor, the Crypt of Uhrma puzzle can make you feel a little lost. There is, however, a somewhat time-consuming way to find the solution, just like with the majority of the puzzles you’ve run into so far.
Like other puzzles and problems in Star Wars Jedi: Survivor, the Crypt of Uhrma problem requires the use of the Force to be solved. Be prepared for a brief detour from the puzzle, as finding the solution will force you to leave it.
The puzzle is a wall with eight raised blocks that can be pulled or pushed using the Force. The solution is rather simple, but it can elude some players as they search for nearby clues.
Where To Find the Crypt Of Uhrma?
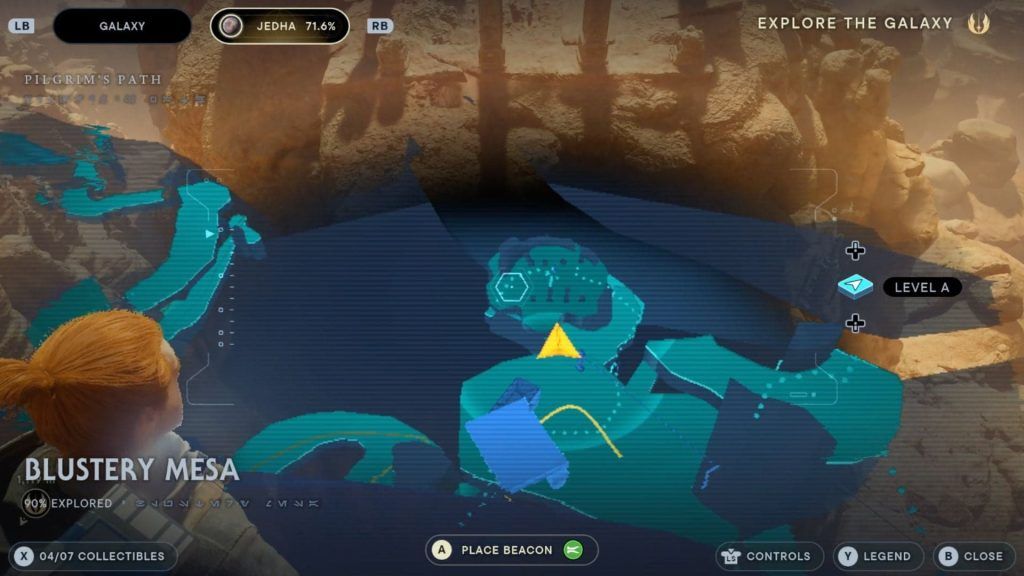
The Crypt of Uhrma is one of the many areas of Jedha that hides puzzles that can complete. It contains a valuable Stim upgrade and Force Echo location.
You’ll find the Crypt near the Crypt of Uhrma Meditation Point, which is located at the center of the Pilgrim’s Path. It’s easy enough to reach, as you simply need to cross the jumping area and defeat enemies.
Once inside, you’ll see a strange wall with blocks that can be pulled or pushed with the Force. The solution to this puzzle isn’t immediately obvious, and if you try pulling or pushing all the blocks in and out of the wall, it won’t work.
How To Solve The Crypt Of Uhrma Door Puzzle?
When you first encounter the Crypt of Uhrma on your journey to Pilgrim’s Sanctuary, you may feel like you’re facing a brick wall when it comes time to open the door.
This unique puzzle demands the Force-pushing and -pulling of eight pillars, and players will likely be at a loss as to how to solve it, especially with a handful of enemies nearby ready to kill them.
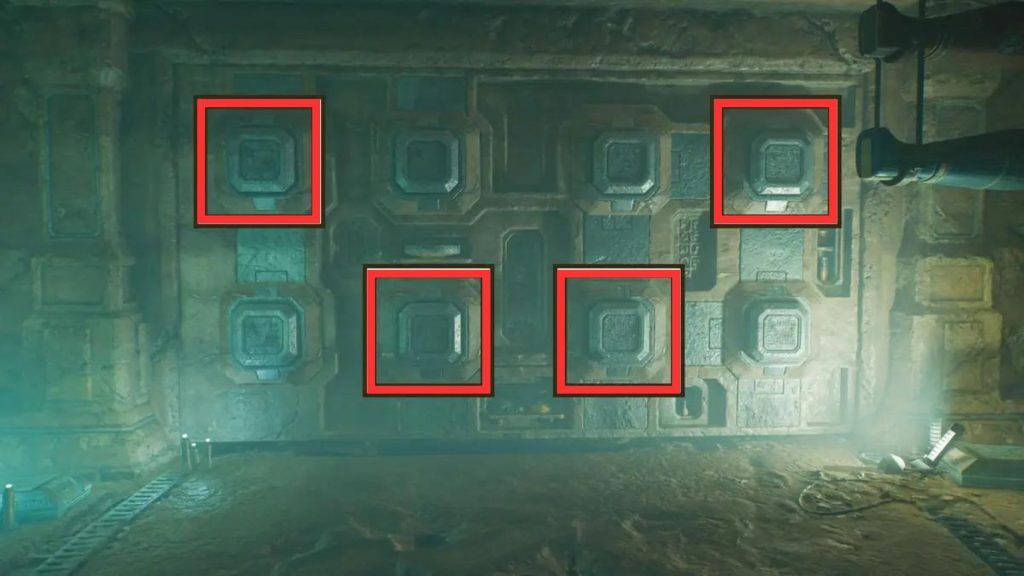
To solve this head-scratching puzzle, you will need to identify the order in which the pillars should be pulled by looking at the pattern on the wall itself.
- The order of the first row is 1, 2, 3, 4. The second row is 5, 6, 7, 8.
- You should pull the first and the fourth pillars and push the second and third pillars into the first row.
- In the second row, you should push the first and the fourth pillars and pull the second and the third pillars.
You can check out the image above that shows which pillars should be pulled.
You’ll need to pull the blocks in the same order each time, or the solution won’t work. If you pull the wrong ones by accident, simply push them back in and try again.
The crypt doorway also contains several enemy crabs that can explode and take out a large chunk of a player’s health, making it important to clear them all out before attempting to open the doors.
Crypt Of Uhrma Rewards
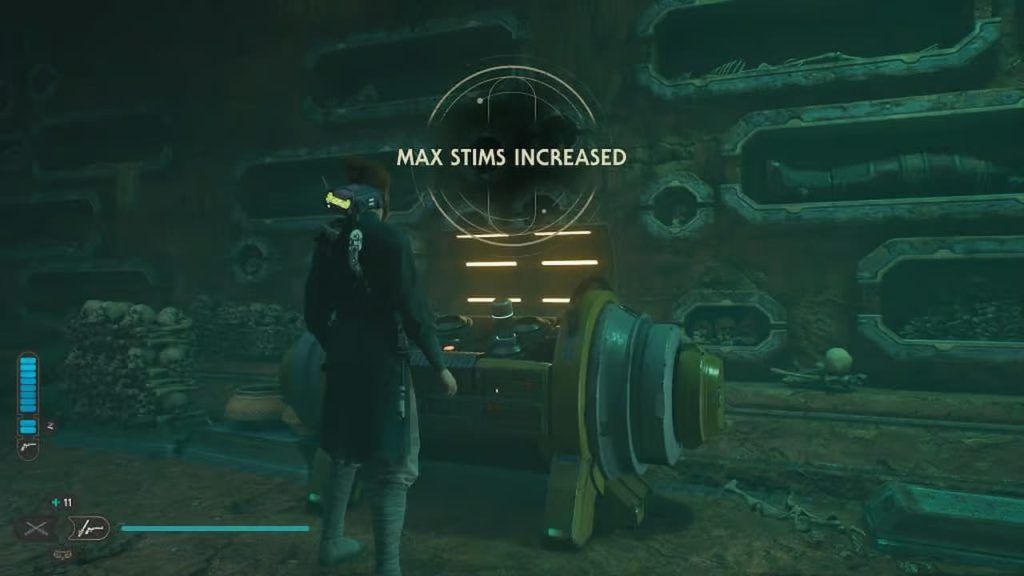
During the trek up the Blustery Mesa, you will encounter a wall that contains eight movable blocks. This is the Crypt of Uhrma puzzle that can be easily missed if you aren’t careful. However, if you want to unlock the rewards of this location, like a stim canister and a Force Echo, then it’s important that you solve this puzzle.
Once you have pulled the four correct blocks, the wall will slide open and reveal a Stim Canister upgrade. This will be the reward for completing this puzzle, so don’t miss it.
This is a great reward to earn since this item will make the fight against the Sutaban Alpha Legendary Enemy much easier for your Jedi.
You’ll also be rewarded with some Essence, which is one of the most valuable items in Star Wars: Jedi Survivor.

